Monday, 28 August 2017

AAR The 8th Army 1943... Breaking the Mareth Line


Montgomery continues his attacks in Mareth line. A frontal attack failed to dislodge the Axis forces Montgomeryordered  the 4th Indian Division on a "short left hook"
flank attack toward Ksar el Hallouf and Ben Zelten.

image from liberationtrilogy.com (2018) 
At this time, the division 4th Indian  only had two brigades under command as the 11 Brigade had not been replaced in the divisional Order of Battle by this time. It was ordered to force the Hallouf Pass. Overnight the 24/25 March 1943, 5 Brigade launched their attack. The pass was opened against severe opposition.

This revised plan did not get off to a good start when X Corps HQ and 1st Armoured Division became snarled up with the 4th Indian in Medenine town. The 4th Indian had to hold back, and could not get moving until daylight on the 24th, so they were unable to mount their attack on the Hallouf Pass until that evening. Special detachments of the 164th Leichte division defend the defiles leading north of the Hallouf and Beni Kredache. The German defence in this sector was  centre on the towm of Matmata. However, the 5th brigade led by the 4/6th Rajatput Battalion had cleared the pass by nightfall of the 25th, pushing the German 164th Light Division northwards. 
The 7th Armoured Division were then ordered to follow up the 4th Indian Division and strike north in pursuit of the 164th Division through the Merbah El Ossif Pass and on towards Toujane. This feat of arms would win the 4th Indian Division a reputation as mountain warfare specialist through out the Tunisian and Italian campaign.
Indian divisions where organised along British lines with small variations in equipment so could be easily substituted for any other British or Commonwealth  units. 

Terrain
The country towards Mareth is undulating. Sandy ridges and bush-covered wadis. Very green in places. The scrub is full of flowers, yellow and blue and white, in great numbers. In the hills deep defiles provide passable tracks through harsh and rocky hills. The area around Hallouf had been considered unpassable by motor traffic when the French built the Mareth line in the 1930's however by 1943 the LRDG reconnaissance considered it passable for modern motor vehicles and had demonstrated this in a series of patrols.

Eighth Army  Forces 
⦁ 4/6th Rajaput Infantry
⦁ 2 Platoons Commonwealth Infantry
⦁ 1st Platoon
⦁ HQ with 2" mortar
⦁ 3 Infantry sections
⦁ Vickers machine gun section with Bren Carrier
⦁ 3" mortar section
⦁ 2nd Platoon
⦁ HQ with 2" mortar
⦁ 3Infantry sections
⦁ 3" mortar section
⦁ 1 Infantry foot patrol
⦁ 1 Daimler AC from 11th Hussars
⦁ 1 Engineer section with mine sweepers and 1 demo charge in 15cwt truck
⦁ 1 timed barrage from 25 pounders of RHA
⦁ 1off table battery of  3" mortars

Special blocking force from 164th Leichte Division
⦁ 1 x Schutzen platoon 
⦁ 1 HQ section
⦁  3 Schutzen squad
⦁ Combat medic
⦁ Light Mortar team
⦁ HMG team with loader
⦁ 1 reserve schutzen section with medium truck
⦁ Defences
⦁ MG dugout
⦁ Mortar pit
⦁ 2x foxholes
⦁ AT gun dugout
⦁ Artillery Observation points
⦁ Off table artillery (2nd prority)
⦁ I battery off table 80mm mortars

Scenario
As in High Ground scenario in the Battlegroup rule book   attacker divides force into 2 assault waves of equal size. Second wave enter table in Turn 4
Defender places all the defences before game begins may be placed anywhere in his half of table. They may choose which end is the defense zone D6 start with Ambush orders. Attacker deploy first wave within 10" of table edge and take first turn.
The area as hills are considered impasable terrain for vehicles patches of bushes on vally floor are difficult ground.


AAR
This one is part of 4th Indians role in the left hook of the Mareth line in  Tunisia, 1943. It was a fun game hard work for both the Indian Infantry from British Infantry Division list in Battlegroup Torch and the 164th Leichte Divion on the defensive (using  German Afrika Corps list from Battlegroup Torch). The Churchill was an ahistorical indulgence my opponent allowed me. As I created these Churchills for Tunisia games although Eigth Army had few of these vehicles and 4th Indian none for historical list see above. The high ground was impenetrable to vehicles this caused some problems. Enjoy.

 Overview of the table with the infantry at there start lines
 Indian  infantry  deploy into the Gully supported by the Churchill tank

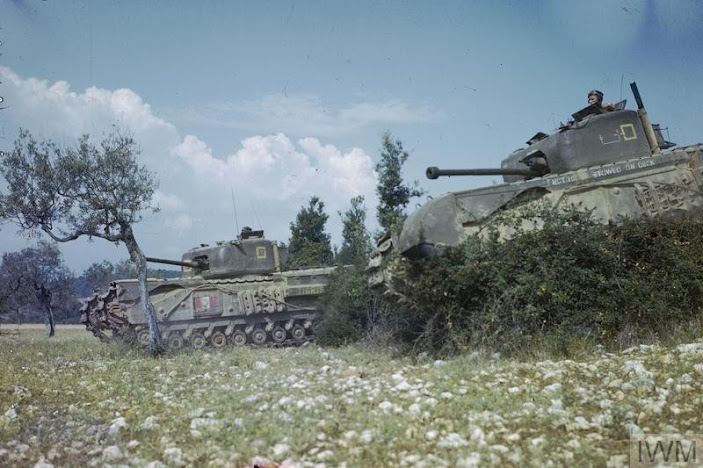
 Churchill advance - exciting for me!
The 164th Leichte Division blocking defenses
 This MG34 HMG cause real problems (the puff of smoke represents Ambush fire)
Mortr fire pins the Indian infantry in the olive groves
Sniper takes up position on the roof of the farmhouse
 British 25 pounders planned barrage crash in - but timed to early and far ahead of the infantry.
The Churchill continues to advance steadily as the PaK38 fails to spot.
 The Germans defensive line
 Indian sappers advance behind the Churchill
The second wave of Rajput Rgt. arrive with the battalion HQ
 My new HQ model "O" group around the jeep bonnet.

 Indian sappers close up
Pinned down the sappers are caught in a murderous crossfire
On the left the Germans well sighted MG bunker is a constant thorn
 Recce foot patrol advances
,,,and catches a salvo of mortar fire
 Aircraft chit - it failed to turn up
 DAK hold this ruin with a medic as the front line
 Looking down from the heights towards that ruin. The Indian's occupy the rocky heights.
The Churchill takes on the AT bunker head on.
Pinned down the DAK face a close assault by the Indian infantry
 Cold steel - Bole Sohe Nihal , Sat Sri Akal!
The DAK fall back to the second line of defence
 German medic heroically rescues men under mortar fire
 This shallow gully was a killing zone for german mortars
 The view from the B platoon HQ
 Indian final BR two lucky draws kept them in the game.
DAK final BR they broke under constant pressure and a bayonet charge on there left flank.

Thursday, 10 August 2017

Scenario and AAR Forward the Guards Scenario 3 July 18th Emieville Charge!


Forward the Guards Scenario 3 July 18th Emieville Charge!


Background 

The Irish Guards are the left flank of the advance and have been drawn southwards toward Emieville as the Coldstream Guards shifted there advance to the right. 
Emieville has been reduced to rubble by the morning heavy bomber attacks. The Irish Guards maneuver around it and advanced eastward 
Heading for the main road at Frenouville. Ahead of the Kampfgruppe Von Luck has hastily thrown a PaK front of Pak 40 and Pak 43. They have not even had time to dismount them from there trailers. As the Irish Guards come into view the guns open fire.

As the battle intesifies Lt Gorman's Sherman "Ballyraggart" round a hedgerow and encountered at 300 yards King Tiger 122. Gorman open fire and began to maneuever Feldwebl Gerber commanding 122 traversed his turret but Gorman rammed the King Tiger immobilising both tanks.  

This is an Attack/ Defence scenario There are 3 objectives in this game placed by . 


British Force

The Irish Guards
3x Tank squadrons each with 2 Sherman III and 1 Sherman Firefly
1x FAC in Daimler Dingo
BR 28   Officer 4

German force

2x PaK 43
1x German Grenadier platoon
consists of
1x HQ
3x Rifle squad with 2x panzerfaust
3x MG42 teams

Reserves arrive from turn 4
Konigstiger 122
BR 22 Officers 2

AAR


We place 3 Objective markers, outside of the deployment zones. They where placed by agreement in German player into the woods he intended to grab early on. The other in the central field and on the track leading to the wood

The Battlefield - German defenders deploy on the left and British attack from the right

Currently my colleague and I are playing through the scenarios of the Forward the Guards! An Operation Goodwood campaign from the old Kampfgruppe Normandy rule set from Warhammer Historical. Using the Battlegroup Overlord rules and the historical forces presented in those scenarios. I am playing the British in the scenarios and he is the German force opposing Goodwood.


This is the third game in the campaign and is based on the events south of Emieville where the Irish Guards ran into the PaK front commanded by Major Van Luck.
A couple of slight changes based on available models. The Irish Guards swapped there Sherman’s for Cromwell’s and the Forward Air Controller was mounted in a Dingo not a Daimler AC. Three troop of tanks (with Sherman Firefly’s) unsupported by infantry would take 2 PaK 40 and 2 of the fearsome PaK 43 supported by a Panzer Grenadier platoon and the rogue King Tiger 122 would arrive as reinforcements.
 The German PAKfront in the wood line
 Panzer Grenadier deployed in the hedgerows.

I decided to post this because it illustrates some of the strengths of German Infantry when used to their advantage. The German infantry left the British wishing for even a couple of carrier sections to be up with the tanks!
The Germans set up there AT guns in the wood line with the MG teams from the Panzer Grenadiers in support. The rest of infantry sections scattered into the hedgerows that criss-crossed the battlefield (a 6x6 table).
 More infantry lurk.

The British tanks deployed from the far board edge advancing on their left and 2 troops up the centre. The Firefly’s hung back on over watch whilst the Cromwell’s advanced shooting to suppress the AT guns which they did to all but one PaK 40. It’s return fire missed but the infantry creeping close using the hedge fired off there Panzer Faust’s - one Cromwell brewed up another was abandoned by its crew.
 The german 88's  join the carnage
 Heavy MG fire pins the British tanks.
The others tanks pressed on. The Firefly’s lacking targets for their 17 pounders rolled forward and began to use their MG’s (they pnly have a coaxial MG!) to suppress the German infantry. This was difficult with the infantries cover and the need to keep out of range of Panzerfausts and close range MG fire capable of suppressing a tank.
With a German squad each part has enough firepower that under 10” it can suppress an enclosed AFV on a 6+. Add the extra bipod mounted MG and this rises to a 5+. This means that even 5 infantry men in a hedge can hold up a attack by tanks and this is what they proceeded to do. In the next three turns the Cromwell’s tried to pin the threatening PaK and roll forwards whilst the infantry squads played hide and seek in the hedges with the Firefly Sherman’s. The tanks dared not stay still and become a sitting ducks. Pinning a couple of Cromwell’s with close range fire and slowing there advance giving the PaK extra time to pick off a further 2 Cromwell tanks.
King Tiger 122 arrived on time in turn 4 and immediately opened fire on the nearest Firefly. Missing it’s own close range shots. The King Tiger seemed in trouble caught in cross fire between two Firefly’s but a turn of terrible shooting left the monster still rolling and bearing down the Firefly it destroyed it with two well placed 88mm shots. A PaK 43 torn open a Cromwell on the left and things looked grim for the Irish Guards.

 The big cat kills 2 more tanks
 The Firefly tries to cover from the rear but the 17 pounder bounce off.
 A firefly destroyed
 Without artillery the Irish guard struggled to suppress the German antitank fire using just their 75mm cannons
 A lucky tank approaches the treeline.
The German player unsuppressed his guns again and immobilised one firefly with a Pak 40 and destroyed the other with a PaK 43. With few tanks left and even less HE ammunition the Irish Guards decided to make use of the fast speed of the Cromwell and raced forwards to crush the nearest PaK 43 beneath it’s tracks. The German’s faced the danger of the Cromwell doing the same to the guns to either side. The whole German PaK front might go the same way!
 A single German AT gun is crushed beneath it's tracks ...no HE left!

Irish Guards lost a lot of tanks to a masterful combined arms defence and a rogue Tiger.

Now the tactical flexibility of the split German infantry squads showed. Orders started to flow to the MG42’s in close support of the guns they opened fire on the tank pinning it with a last ditch rush by the nearest Panzer Grenadier squad. With all the other British tanks now immobilised by a breakdown or pinned the British player had to take a counter to risk unpinning his last tank a 4 took the British over their BR total of 31 by 2. With tanks burning across the filed the Irish guards remaining HQ and FAC withdrew abandoning their immobilised tank.

The key feature of this battle was the use of the German Panzer grenadiers. The orders for the Germans went first to the Panzerknacker in the rifle section they prevented a quick British advance to engage the AT guns and forced the British tanks to spilt their fire. The high RoF of the sections means that at close range they can suppress the tanks and force counters to be taken to unpin them. Once they closed the rate of fire that each German section meant that orders could now be given to the MG teams to defend the guns of the PaK front.
The armour has the glamour but the infantry won this battle for the Germans.

Scenario and AAR Crete Campaign Turn 2 Battle 3 Vlakheronitissia

  Attack-Counter Attack at Vlakkheronitissia Campaign day 1 Turn 2 Meeting Engagement Attack / Counter attack  DUKE Forces Officer 1 BR17 Sc...