Silchar Bridge Imphal 14/15th April 1944
The History
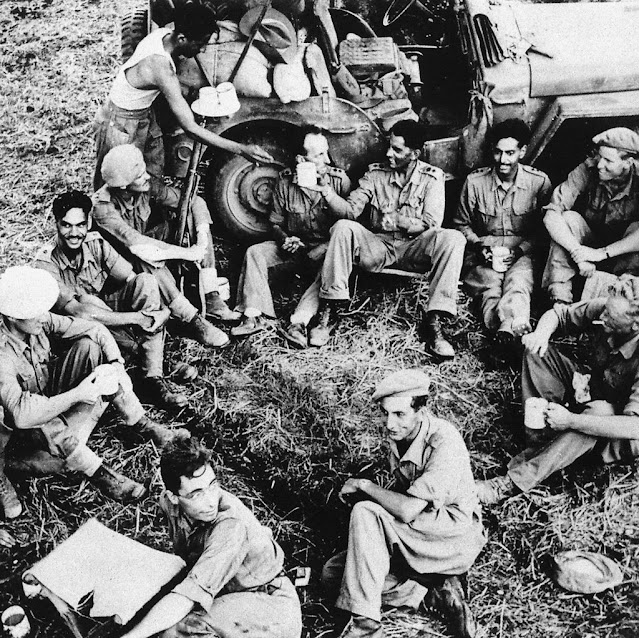
Officers and Men of 7/10th Baluch Regiment Burma 1945
General Yanagida
of 33 Division before leaving Singgel “ordered Colonel Sasahara to send a
raiding party to destroy the suspension bridge on the Silchar track at
milestone 51 from Imphal (34 from Bishenpur). The Japanese believed this
track could form an alternative supply route for the British when the
Dimapur-Imphal road was cut. A party of six infantrymen, four sappers and seventeen Jiffs, commanded
by Lieutenant Abe, set off across the hills on 28 March for this raid….
…While these moves were taking place the raiding party which Colonel
Sasahara had dispatched from Singgel to cut the Silchar track was nearing
its destination. However, while resting in a village about five miles
south of its target, the bridge at milestone 51, it was surprised by a
patrol of the 7/10th Baluch (two companies of whom were under
command of 32 Brigade) and lost several men killed. Despite
this sharp setback the party reached its goal on the 13th and watched
many jeeps cross the bridge. The next day they reconnoitred the bridge and
made their plan. It was a big suspension bridge capable of taking light
vehicles and with a 330 foot clear span across a gorge about 80 feet deep.
There were sharp turns on to the bridge at each end. An Indian
Field Company was working on the track and guarding the bridge
at night. Their task wasn’t an easy one.
Accounts of what happened that night differ. About midnight on the
14th/15th the Japanese seem to have created a diversion on one bank and,
under cover of this. Sergeant Saito and three sappers slipped unseen onto
the bridge from the other side. Charges were laid on each of the cables
and at 0300 both charges were fired simultaneously, the bridge falling
into the river. According to Japanese accounts one Japanese sapper
jumped to his death and two were killed in the explosion. Nevertheless, it
was a very successful and daring exploit and was duly acclaimed as such on
Tokyo Radio. The bridge was not repaired and open to traffic again until
the 10th of June, by which time it was irrelevant. For the British, who
knew that only a trickle of supplies could come this way, this was
a relatively minor set-back and by no means as serious as
the Japanese supposed. The Japanese, however, thought that to
cut this track was essential to complete their encirclement.”
https://www.worldhistory.biz/sundries/15832-chapter-nine.html
Terrain
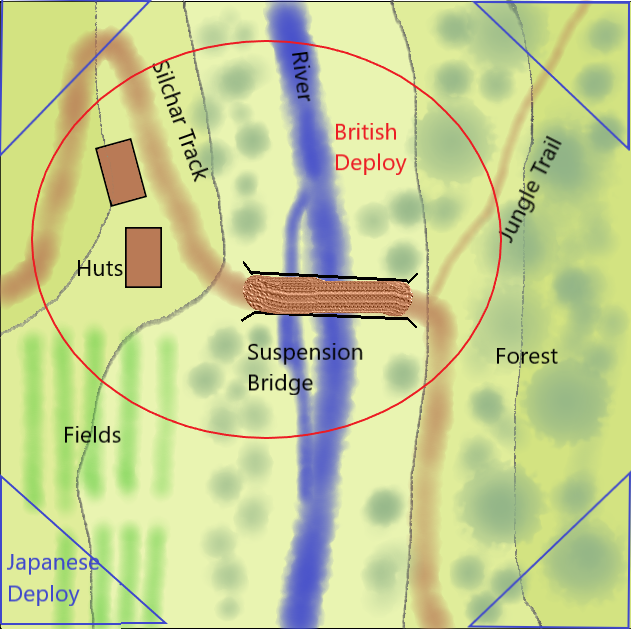
Leitanak River gorge Manipur India is a steep side gorge forested on the east and with fields and trees as well as a few houses on the west and counts as difficult terrain off road. The Silchar track makes a sharp turn onto the bridge in both directions. The river is passable as dangerous terrain. A narrow track leads into the jungle North East. There are several jungle huts on the west bank they should provide only soft cover. The jungle and trees also provide soft cover. . The bunds around the field provide hard cover for troops behind them
Forces
British Empire Force
1 Indian platoon from 7/10 Baluch
1 Tiger team 3 men with rifles
1 platoon command 6 men with rifles including Officer
2 rifle sections 9 men with rifles
1 Bren section 5 men with 3 Bren guns
1 Indian Field work platoons (Auxillary) platoons
1 Platoon command 5 men with rifles
3 sections 9 men with rifles
Defenses
1 set of foxholes for 10 men
Imperial Japanese Forces
1 IJA Command veterans Lt. Abe with 6 men including Officer
1 IJA Sapper Veterans Sgt Sinto and 4 men engineers with demolition charges
1 INA Platoon (reduced) 17 men
1 Tiger recon section
1 Platoon command 6 men
2 sections 9 men with rifles
1 Bren section 6 men with 3 Bren guns
The Battle
The Japanese player divides his force into upto 4 divisions (he may use less if he chooses)and secretly decides which deployment zone to assign to which force. The British Indian forces then deploy all there forces on the table in the
area of the village and bridge. The British empire force may deploy there defences The remainder of the Forces can enter from
either road south or north after turn 3. The Japanese forces arrive from turn 1 in the Japanese players deployment area of choice on a role of 1-3 on a 4-6 the division is delayed and does not arrive yet, It may role again next turn.
Special Rules
Bakugō sa seru! – (Detonate!)
Any Japanese
sapper who has been on or in contact with the bridge by attempt to demolish the
bridge by being given the Engineering
task Special order. Any Japanese Sapper who has the Banzai rule in effect may
attempt to demolish the bridge by moving into contact with it. If the bridge is
destroyed the British Imperial forces must take 2 Battle rating counters
immediately. For each failed attempt to
detroy the bridge the Japanese Imperial player must take a Battle Rating
counter.
Night battle –
All aircraft chits count as 5. There is no close air support available
during the night.
Supressing fire is unaffected but Aimed fire has a maximum range of 20”
No spotted indirect fire all fire support must use a Pre-registered
Target or timed barrage


Comments
Post a Comment