Sidi Abdullah Pt 137
 |
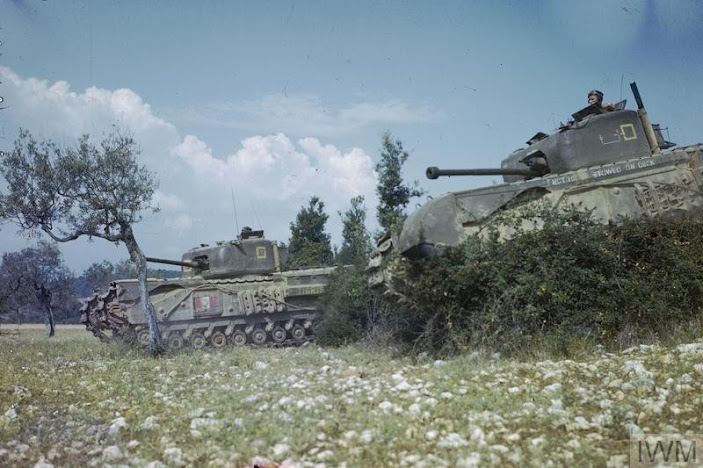
| Churchill tanks go into action near Ksar Mesouar, 28 February 1943,. IWM NA911 |
The History
“27 April. The night was dry and clear. For three and a half hours the MTF sat in their vehicles looking at the battlefield on their right. ‘A’ Coy, 1 RWK captured Sidi Salem after a hard fight. The enemy came in with a strong attack on Sidi Mediene with flame throwers and was beaten off by the Black Watch. The whole area was lit by flares, tracer, explosions from grenades and mortars. By 0330 hrs time was short if the lanes were to be completed by dawn. The mines in front of Sidi Abdallah had upset B Coy’s attack in an unexpected manner, Coy’s compasses were affected, direction lost and the OC decided to halt and wait for a day before making the attack. The 7th would therefore be going into uncharted country, not for the first time. A and C Sections prepared to clear the gaps by hand because the ‘Scorpions’ were unable to cross the Oud Hamar diversion. It is odd that every conceivable type of vehicle could cross except the ‘Scorpions’. One explanation at the time was that they must not be seen in daylight. Lt Foster-Anderson went forward and recced the minefield and the location of the points where the gaps were going through. The MTF facing the objective with A Section on the left and C Section on the right, some 200/300 yards apart. The Sections went forward to make the lanes, A Section using detectors and C Section using bayonets. The minefield consisted of four rows of Mk2 Teller mines running parallel to the line of hills. Dawn was breaking and the mist lifting up the slopes of Sidi Abdallah, and nearby MGs (Spandau) were beating out a message with a stream of fire close by from left to right across the 7th’s front. Work was speeded up and risks taken to complete the task. The work was completed in record time and the Sections returned to Banana Ridge none the worse for wear. ‘A’ Squadron 12 RTR drove their ‘Churchill’ tanks through the gaps made by the Shiny 7 in support of 1 RWK. The tanks reached their objective Sidi Abdallah, however, the infantry was held back by fierce MG fire. The tanks held on reinforced by A Coy 6 Black Watch, the force was pushed back by a counter-attack with ‘Tiger’ tanks. In the next few days, Sidi Abdallah changed hands eight times. Each time the infantry and support weapons took the objective they were not strong enough to hold on.”
From the war diary of 7 Field Company RE at http://www.shiny7.uk/7Coy1943.html

Point 137 a low hill overlooking the road to Tunis. And forming the southern end of the German HKL.
Terrain
A gently sloping open fields with a rocky low ridge. There are a few olive groves and some scattered scrub trees but little cover. A single small farm on the south side of the field Sidi Salem.
 |
| Point 137 today |
The Game

This is a Company size game.
The players deploy 5 objectives alternately beginning with the German player.
The Germans are defenders and deploy all their forces in the German deployment zone. The German player may also deploy minefields and 1d6 units in the German Forward zone. The German player may deploy Reserve 1 after Turn 7 and Reserve 2 after turn 9.
The British player then deploys the 12th Royal Tank Regiments and 1d6 other units from the main force in the British deployment zone. The British player is the attacker and gets the first turn. The British player may bring on 1d6 units from the main force until all units are deployed from any board edge on the British deployment zone. After turn 5 the British player may deploy 1d6 units from the reserve force each turn until all are deployed.
The game ends when one side exceeds the BR total and all objective’s claimed victory is possible
British Forces
946Pts Officer 6 BR 64
Main force
12th Royal Tank Regiment
Churchill Troop 1
3x Churchill Mk IV (6 pdr)
Churchill Troop 2
3x Churchill Mk IV (6 pdr)
Churchill Troop 3
Churchill Mk I (3” Howitzer)
“A” company 1st Royal West Kent Regiment
Rifle Company FHQ
RA Forward Observer team
1st Platoon
1x Platoon HQ
1x Boys anti-tank rifle
1x 2-inch mortar
3x Rifle team
2nd Platoon
1x Platoon HQ
1x Boys anti-tank rifle
1x 2-inch mortar
3x Rifle team
Reserve
4th Black Watch
3x Rifle team
1x Boys anti-tank rifle
1x 2-inch mortar
Support
2x 25 pdr Field Troop
2 x 4.5” Gun
German Forces
946Pts Officer 4 BR 44
Main Force
Fallschirmjӓger Company FHQ
1st Fallschirmjäger Platoon in foxholes
Fallschirmjäger Platoon HQ
3x MG42
3x Rifle Teams with AT grenades
2nd Fallschirmjäger Platoon in foxholes
3x Rifle Teams with AT grenades
2x sMG42 HMG dugouts
1x PaK 40 antitank gun in dug out
Support
10.5cm Artillery Battery off table
80mm mortar battery off table
2 minefields
Forward Observation team
Reserve 1
1 Heavy Tank Platoon
1 x Tiger
1 x Panzer III (7.5cm)
Reserve 2
1 x Tiger
After action report attack on Point 137


I wrote this scenario and based all the lists all the events of the first day of this battle. So as I took command of the British forces I tried in my plan to avoid the problems of the British attack that day when heavy machine gun fire from the Ridge separated the tanks and infantry.

I decided to attack up the centre and concentrate my tanks with waves of infantry in support I hope this way to avoid tanks being picked off by German troops using anti-tank mines and use the tanks to neutralise the many MG 42 machine guns with which the German paratroopers would be armed. I initially deployed my Churchill thanks in two groups either side of the olive Grove supported by my engineers who would ride the tanks as far as the minefield and my artillery observer. The initial move forward began a steady advance of the Churchills whilst before would observer used his carrier to get


into position. In my first disastrous misjudgement of the day, they found himself too close to the German heavy machine guns I was quickly pinned by sharp eyed Machine gunners. The two-man team then lost to man and was eliminated. This would severely limit my artillery support leaving one of my batteries without a spotter. German mortars began crashing in amongst the tanks but we're unable to pin the Churchills which rolled on regardless to the barrage.


My first platoon of infantry then began their advance through the olive Grove towards the low hill in front of the Ridge which was that first objective. Mortar and MG fire was heavy hope that they would clear this and then attack towards the objectives on the Ridge to the left and right. Initially the plan went well with the tanks using their machine guns to pin down the dangerous German MG42s.


The company forward headquarters got into position by the farm at Sidi Salem. From here they will be able to direct the artillery fire onto the Ridge. One section were sent to capture the farm or opposed whilst the bulk of the platoon advanced to the German mortar fire towards their objective. I think my central attack unbalanced the Germans a little as they had expected an advance nearer the farm which would take advantage of the cover around it but I was hoping to use the covering fire of the tanks and my machine guns to suppress the Germans along with my artillery.


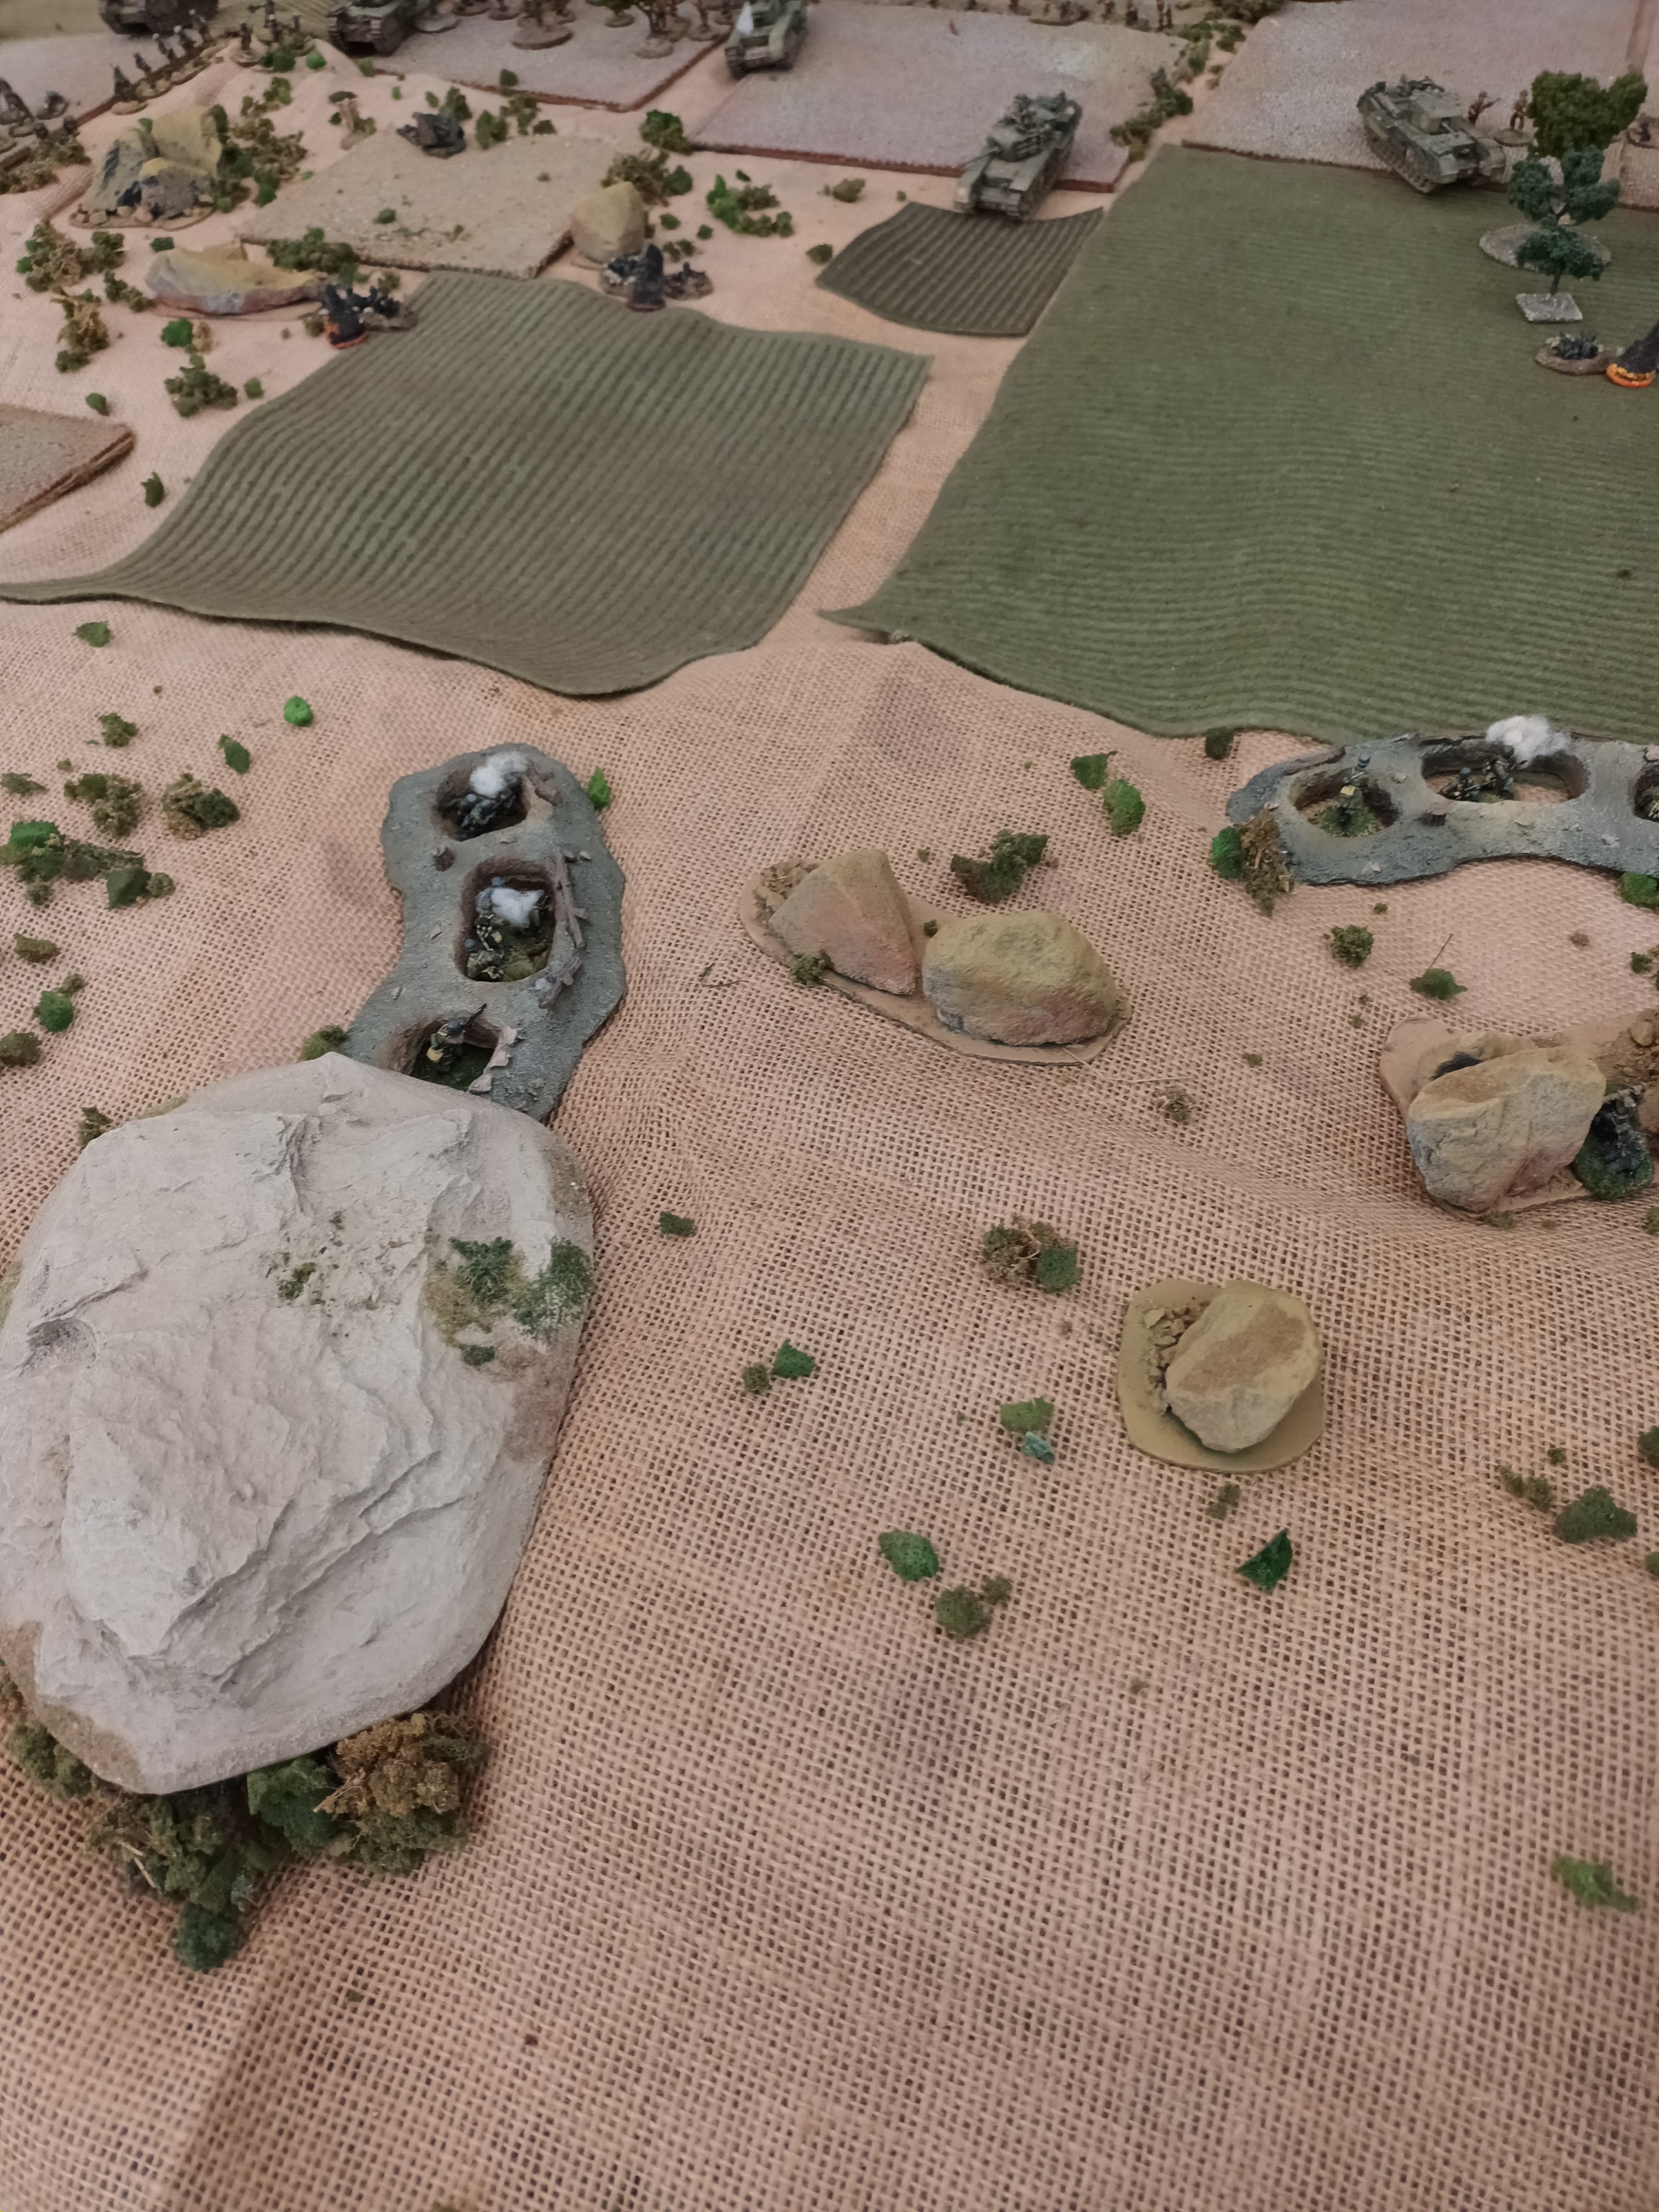
Meanwhile my tanks had arrived the minefields deployed by the German in front of the low hill, and I debussed 2 sections of Royal Engineers (mine are engineers from the Indian army) to begin the most difficult of battlefield tasks clearing mines under fire. It would take the two sections several terms to clear both mine fields but a combination of artillery and support from the tanks machine guns kept enough of the covering Germans in their foxholes pinned to make the risky manoeuvre successful. By turn 5 the tanks would be rolling forward again through a gap in the Germans minefield.


At last first platoon develop their attack against the low hill as the second platoon move to reinforce them while sending one section to support the tanks moving up against the Ridge and our second objective at the height of Point 137 indicated by rocky outcrop on the tabletop. This meant capturing a small olive Grove and it was here that the plan most closely nearly came unravelled when a machine gun team from the Jӓger regiment set up and began sweeping the fields with fire pinning the infantry support. Leaving the tanks on my left dangerously vulnerable, although the two inch mortars gave valuable supporting fire, it wasn't long before the paratroopers of Jӓger regiment Herman Goёring were out of their foxholes with their anti-tank grenades and stalking the Churchills through the olive Grove. I was fortunate with the rolls of these veteran troops as they made several unsuccessful attempts which got many of their number killed as they tried to get close enough to use anti-tank grenades against the tanks. Always a bold and desperate manoeuvre which did not succeed on this occasion. Although they were tough to eliminate and it wasn't until the machine gun team were knocked out by the tanks that let the infantry role to catch up and clear the olive Grove. Meanwhile heavy fire from the infantry dug in on the Ridge we're supported as the first of the Germans tank response arrived in the form of a Tiger and the Panzer III ausf. N


The German players sent one of these to each end of the Ridge. With the Tiger being sent where have the best field of fire. I had some trepidation as the tigers began their work in the ideal situation sitting back with their long gun and trying to pick off my Churchills at long range. My main hope was that the heavy front armour on the Churchills would provide some protection against the Tiger’s potent main armament. This proved to be true with one Churchill surviving two hits from an 88mm cannon and a direct hit and 105-millimetre artillery shell (armour is good all-round on Churchill) however the Tigers clearly have no intention of moving down off the Ridge.


Satisfied to try and pick off the Churchills as they move forward which they managed to do with two before the battle was over. The Churchills use their six pounders with predictable effect, bouncing off the Tigers on several occasions before switching to high explosive to try and suppress the monster tanks. Although it was the Royal Artillery 4.5” guns that cramped the Tigers style more than anything else.


Casualties have been fairly light thus far, so I decided to push on for the Ridge as the Tigers withdrew to re-arm no targeting the machine gun pits, I'm dug in infantry on the high ground. The artillery had now shifted ahead of my infantry to try and suppress and pain the fire coming from the hill and it was a casualty from this which finally caused the Germans to withdraw from the Ridge. Leaving me you with a somewhat surprise victory.


Overall pleasing game it was a tighter run thing than the BR totals might suggest as many of my Churchill tanks were running out of ammunition of reduced to just machine guns. However starting to wonder what I would be able to do to prevent those Tigers just rolling down off the Ridge and destroying my force. It is nice to see the British heavy tank going up against the German one and winning.

Chatting after the game I've made a couple of changes to the lists giving the Germans if other would lie to try the game to improve Germans would have an anti-tank defence at least somewhere along the range for the whole time. I love that one can try to use historical combined arms in BG and have reasonable chance of success. Great game. Thanks, Warwick, for being such a pleasant opponent. Bad luck about the Luftwaffe repeated failures to show!


Comments
Post a Comment