
Scenario and AAR - Kiwis hunting Tigers. Sant' Andrea July 1944.

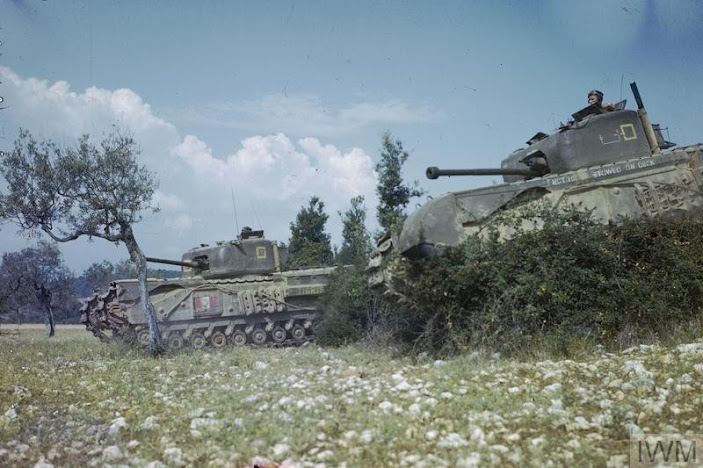
Kiwis hunting Tigers. Sant' Andrea 30 July 1944.   


History 
In late July and early August the 13 Corps are pushing toward the Arno River and Florence. With British, South African, Indian as well as the New Zealand division pushing ahead side by side there was a spirit of competition regarding who will get to the Arno and Florence first. As the 2nd New Zealand Division runs into the Paula Line defences 4th brigade crosses the Pesa River and the German defenders from 4th Parachute Division stop giving ground and resistance stiffens. The 503rd Heavy Panzer battalion armed with fearsome Tiger tanks arrives to stiffen the defences. A company of 23 NZ battalion push ahead beyond Santa Casciano supported by tanks of A squadron 20 NZ Armoured Regiment. According to the official account they ran into resistance from the Paratroops supported by a Tiger tank.   

" A platoon from A Company, 23 Battalion, went along the road from Spedelleto to see whether the enemy had withdrawn from Sant' Andrea, which was less than 600 yards from the company's foremost positions. The platoon crossed a small gully, and as it topped the rise before reaching the village, ‘came under concentrated fire at short range from several automatics and retired hurriedly and in some confusion….’
It was proposed that A Company should put in a dawn attack on Sant' Andrea. A few of the men apparently ‘felt that the limit of their physical and nervous reserves or of what should be asked of them had been reached’ and refused to go. The CO (Lieutenant- Colonel Thomas) personally led the way ‘to show the men he would not ask them to do anything he was not prepared to do himself.’3
The artillery fired a stonk on the village, and A Company attacked with a troop (three Shermans) of A Squadron, 20 Armoured Regiment, in support. A blown culvert over a ditch blocked the road in the gully, but a way across for the tanks was found and improved by men working with shovels. A few prisoners from 10 Parachute Regiment were taken on the other side of the gully, and the tanks and infantry went on to the village. Thomas returned to Battalion Headquarters while the company commander (Captain Duncan) and his men continued with the occupation of the village, from which about 50 or 60 Germans had withdrawn only a few minutes earlier.
The enemy, however, was still in the proximity of Sant' Andrea, and from Villa Mazzei, about 300 yards to the north-west, commanded its southern access. He shelled and mortared the village, and it was anticipated that he would counter-attack. Strenuous efforts were made to get support weapons to A Company, but wheeled vehicles could not pass the demolition on the road from Spedeletto, which the engineers were unable to repair because all movement on the road in daylight drew fire; their bulldozer had to be driven hastily into cover. When a Tiger tank was observed working its way towards Sant' Andrea, two M10s were dispatched to support A Company, but were halted by the state of the road. Mortars, sited well forward, were directed on Villa Mazei and other targets considered too close for the artillery.
The enemy counter-attacked about 1.30 p.m. His infantry infiltrated through corn and olive trees while the Tiger came along PAGE 159the road from the north. The tanks with A Company, commanded by Lieutenant Colmore-Williams, raked the olives with their machine guns and 75-millimetre guns, firing into the trees for air-burst effect. A bazooka team was wiped out within a few yards of the troop commander's tank, and afterwards 15 German dead were counted in the vicinity. The Sherman's also kept the Tiger at bay. A bend in the road allowed it to approach within 100 yards before it came into view, but each time it ventured round the bend ‘it was blinded by a round or two of smoke and chased back into cover, tail first, with six or seven armour-piercing and high-explosive shells buzzing around its ears.’ Finally it withdrew altogether."


Late in the afternoon enemy infantry attacked again, but did not dislodge A Company. ‘My blokes shot about 12 counted Jerries from the top windows and really had quite a good time,’ says Duncan. The New Zealand casualties at Sant' Andrea that day were very few and included only one killed. "

from The Official History of New  Zealand in the Second World  War 1939-1945, Italy Volume II- Cassino to Trieste, Historical Publication Branch, 1967, Wellington.

Terrain 

Forested ridges and tilled valleys filled with olive orchards and vineyards make for dense terrain off the roads which have been deliberately cratered by the Germans.  


Deployment

The 22 battalion  of 6 brigade, 2nd New Zealand Division are attacking toward San Andrea. This section of the Paula Line is held by 10th Parachute Division the arrival of a Tiger tank from 503 s.abt. the paratroops have counter attacked the advancing New Zealanders. 

The New Zealand forces set up within 20" of the south Western  table corner. German Fallschirmjager  forces are placed within 12" of the northern table edge. A 1d6 units are deployed in the first turn and each subsequent turn a further 1d6 units arrive at the respective table edge. 


Special Rules

The road to San Andre has been demolished and is only passable by tracked vehicles. 

Victory  

There are four objectives Sant Andrea, Spedatello, the gully south of Spedatello and the hill at Villa Mezei. The first to hold all objectives or exceed the BR rating wins.  

Maps

Map of the modern area from Google Maps 

After Action Report 

Forces 

forces from 2nd New Zealand Division

Forward Headquarters Lt Col Thomas & Captain Duncan (3 men) Officer, Artillery Spotter

1 platoon from  A company 22 battalion  


  • Command Section  and PIAT team  5 men Officer, Mortar Spotter 
  • 3 rifle sections 10 men with Bren
  • Light mortar team 2" mortar

Sherman tanks A squadron 20 New Zealand Armoured battalion  


  • 2 Sherman III tanks 
  • 1 Sherman III tank Lt Colmore-Williams Officer, Mortar Spotter

1 M10 Tank destroyer 
1 Vickers Heavy Machine gun team 3 men
1 Medium 3" mortar team 3 men 

3 Officers  26 BR  320pts 


forces from 10 Parachute Division and s.Abt508 


1 Fallschirmjager platoon 


  • 1 Platoon command  6 men Officer, Mortar spotter.
  • 3 Fallschirmjager squads 5 men with MG42 
  • 3 MG teams 3 men with MG42
  • 1 Light mortar team 2 men with 50mm mortar
  • 1 Medium mortar team 3 men with 80mm mortar 
  • 1 Panzershreck team 2 men with Panzershreck

1 Panzer IV G tank 
1 Panzer V Tiger I tank 

1 Officer 20BR  318pts

Historical forces should have 2 more platoons with medium mortars teams  a side of infantry and the New Zealanders add 1 M10 and a timed 25 pounder stonk. The German support should have a panzershreck team and medium and light moratr per platoon.  

AAR 


Comments

Popular posts from this blog

AAR The Bitter taste of Sugarloaf - Battlegroup Pacific War Scenario

Japanese defenders set up trench lines anchor the center, a pill box with AT guns out front covered by MG bunkers covering them. the furthest flank has a sniper on ambush fire (indicated by a puff of white smoke.  The US marines deployment on the Japanese right flank, Lots of small varied teams with a dizzying variety of equipment and specialisms. The rail line is actually in a shallow ravine so we agreed a special rule that shooting in and out could only be done from with 5" of the line. An artillery's observation bunker with FAO team. There is another off table on Half moon hill. This bunker was the only thing I placed on the ridge apart from the cave mouth which I placed nearby on the reverse slope. The bulk of the defenders would be hidden here safe from US air and artillery's strikes. The Japanese artillery's fire was efficiently suppressed all game by big off shore naval guns firing in the counter battery role. . Marine recon teams creep forward under fire from t

Scenario and AAR Vulcan Begins - Sidi Abdallah 27th April 1943

  Sidi Abdullah Pt 137 Churchill tanks go into action near Ksar Mesouar, 28 February 1943,. IWM  NA911 The History “27 April.  The night was dry and clear. For three and a half hours the MTF sat in their vehicles looking at the battlefield on their right. ‘A’ Coy, 1 RWK captured Sidi Salem after a hard fight. The enemy came in with a strong attack on Sidi Mediene with flame throwers and was beaten off by the Black Watch. The whole area was lit by flares, tracer, explosions from grenades and mortars. By 0330 hrs time was short if the lanes were to be completed by dawn. The mines in front of Sidi Abdallah had upset B Coy’s attack in an unexpected manner, Coy’s compasses were affected, direction lost and the OC decided to halt and wait for a day before making the attack. The 7th would therefore be going into uncharted country, not for the first time. A and C Sections prepared to clear the gaps by hand because the ‘Scorpions’ were unable to cross the Oud Hamar diversion. It is odd that

Scenario and AAR Clearing the Road to Bou Arada 11 January 1943

  Clearing the Road to Bou Arada   11 January 1943 The History On 11 January, a squadron of 2 Lothian & Border tanks was sent from Goubellat to clear the enemy from the area. Advancing on each side of the road, several of them got bogged down in thick mud created by torrential winter rain. 2LIR was ordered to protect the tanks while they were to be dug out of the mud. Two motor companies of 10 Rifle Brigade were involved and they headed south and then east to attack farms held by German units. They found the task impossible and were withdrawn after suffering five fatalities. Battle British are advancing and have first move. Heavy rain in recent days means that movement of road is in difficult terrain and vehicles can become bogged down if the leave the roads. The paratrooper of Herman Goering Jaeger Regiment are holding the farms to the East of the Bou Arada Road and preventing movement on the road. The  2 Lothian and Border Horse supported by 10 Rifle Regiment set out to cle