Sunday, 22 January 2023

On the workbench Vultee Vengence MkII

The Vultee Vengeance MkII was an American purpose designed dive-bomber aircraft purchased in large number by British Empire and Commonwealth forces and used in the Far East. There were over 700 in total each carrying 200lbs of bombers Although Battlegroup does not require the use of models for air attacks I love to see them on the board. Battlegroups philosophy is "toys on the table" .  Both preplanned and random air attacks now have the option for this dive-bomber in addition to my Hurri-bomber.
This old FROG model from back i the 70's or 80's. It was a pleasure to  finally put this old kit together. Even the decals held up so I didn't need to use my alternative RAF decals. This set of decals  in for  84 squadron RAF (SEAC) Maharajpur India 1944.

The crew models are replaced with Grubby Tanks Britannia WW2 pilot models as I wanted to make this one with the canopy open so replaced to tiny old pilot models with these detailed metal ones.
All planes end up on my flight base for games I thought about replacing the twin .30 caliber MG in the rear seat with metal but in the end decided to keep the original and mount... good enough. perhaps I will revisit in the future.

Tuesday, 27 December 2022

Battlegroup Barbarossa Campaign Luga River 15th to 20th July 1941


End of Move 1 in Turn 1 Morning of July 16th


Stoyanka State Farm Move 1 Morning 16th July  Counters within three hexes can move into the battle as reserves. Guns with 15 hexes can be used as additional artillery support


Germans advance guard  from  Kampfgruppe Raus of 6th Panzer division have deployed around the bridge over the Luga river and the village of Ivanskoya. The Soviets advance from the east and west. The Germans counter move with infantry and armour in spoiling attacks. Our first battle will be on the Western approach 400 points of Soviets and 400 points of Germans both with additional artillery support allowed due to the range to off table 

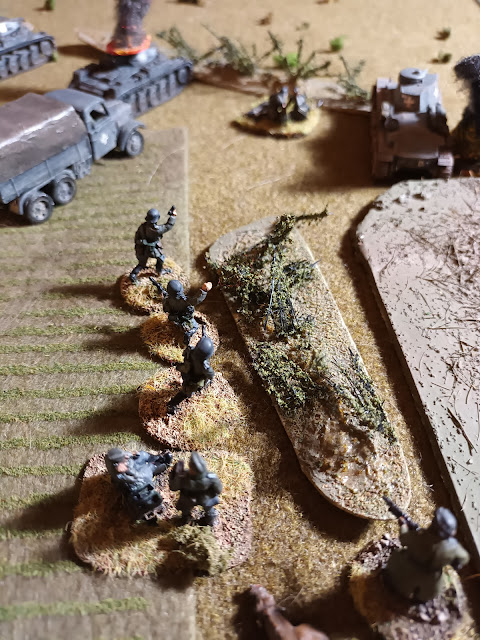
German infantry advance under fire from infantry guns 
Schutzen platoon HQ and artillery forward observers 


The first full battle from the campaigns after the first moves will be an attack counter attack the German bridgehead from the West. The Russians advanced onto the board first bringing anti- tank guns and infantry guns with horse drawn limbers to take up position around the Stoyanka State Farm they had closed their artillery  into the woods to the north and will be able to fire from off table (additional fire support may be chosen- a lot of counter battery fire!). Two long 45mm antitank guns, one  on each


Soviet guns and infantry take up position in the farm


flank of the position an 76.2mm infantry gun lots of loader teams would make these key guns hard to shift. 

Infantry gun and Soviet HQ at the centre of the Soviet position


The German counter attackers advanced from the east initially using the road with a Stug III supported by two infantry squads and a heavy machine gun advancing in the thick woodland on either side of the road this would begin a duel with the Soviet anti tank called at the far end of this road which would last for most of the battle. Early on the Germans got lots of reinforcements the "panzer marsch" really help there. Out in the fields another German section and the HQ took up position whilst a forward observers in a medium truck tried to move forwards but they can quickly under fire from an infantry gun in the farm it's made life difficult as there wasn't much cover.

StuG III leads the German infantry in the advance down the road

Russians had two infantry platoons one of which took up positions in the farms buildings they had one section in a lorry the restaurant thought meanwhile a girls Jeep with HQ came forward and took up position in the barn the Soviet 76.2mm infantry guard fired out into the fields supported by Maxim machineguns from the farm buildings. The attacking Germans faced the 45 millimetre AT gun on the road continued to tangle. On the road the gun exchanging fire with the Stug III the gun lost this duel early point became pinned indicated by the smoke. Soviet infantry advanced through the farm and through the woodlands to the North. Meanwhile in the animal pen covering the fields they would soon be busy!

Russian artillery and anti tank guns take there toll on Pz 35 t


As turn three began the German attack got underway in earnest. A timed artillery with devastating effect what text advanced across the fields towards the farm. The StuG III continued its advance along the road exchanging fire with a 45mm anti tank gun. The dead cows and tractor parts indicate objectives claimed by the Russians as they occupied the farm. The 37mm guns of Pz.35 t's begin their deadly duel with the Soviet anti tank guns. The German squads MG34 brings the gun under fire but the cover of the farm and fencing and the loader team made it hard to take out the crew and allowed it several extra shots which it made count against the advancing German infantry pinning them. The gun pins the platoon headquarters the infantry out in the fields preventing them from calling on the mortars that could support the attack.

Tanks and infantry advance across the fields 

German artillary pounds the farm whilst the StuG advances.

StuG meets its end ambushed by Soviet Armoured cars and infantry


The StuG assault gun continued its bold advance along the road almost reaching the crossroads objective beside the farm. Many of the infantry were still pinned by the heavy German artillery fire and from beyond the table edge to the rescue came  three armoured cars - a BA6 from two BA10. Their  long 45mm guns prove a considerable danger and the Stug's attempted to engage with its few armour piercing shells from its short 75mm gun. Missing the largest of the Soviet armoured cars. The strength of Soviet armoured cars in Barbarossa games should not be under estimated. As the armoured cars have very good long 45 guns in their turrets and can advanced quickly on roads. This the Soviet light armour did just this  sweeping  past the assault gun to engage it's side armour, successfully knocking it out, but only after it had been pinned by anti tank rifle shot from the  infantry in the woods. The armoured cars surrounding the StuG from every direction it took fire from two of them to destroy the vehicle.

Pz 35 t and Landser counter assault the barn of the state farm

Meanwhile out in the fields the German panzers were having a hard time of it as the Soviets own artillery began firing pinning down vehicles and destroying others pretty swiftly. Only one of the Panzer 35 t remained. However the infantry in the woods beside the buildings continued to press on bringing the Soviet infantry in the nearest barn under suppressing fire. While Panzer Grenadier manoeuvre to assault the building. Seeing what was happening the Soviet commander chose to evacuate the barn rather than face the German Panzer Grenadier is in a close assault. The final panzer 35 t moves off to support and engages a Soviet armoured car with its 37mm main gun this would prove that this will prove the end for the armoured car. 


 Out in the fields however machine gunfire from the Panzer II and MG34 finally destroyed the crew of the AT gun that has caused much execution amongst the advancing tanks. With the gun holding this flank knocked out at last the remains of the panzer II's - only one of them - are getting ready to move towards the farm now the gun was removed as a threat. The German forward observers and platoon HQ made good use of two mortars in an of table battery and a supporting mortar in the woods beside the road to pin down and harass the Soviet defenders of the farm. Soviet counter battery fire was directed at the off table mortars but proved mostly ineffective.


The Panzer Grenadier of the 114th regiment would take the barn the first of the buildings from here they could bring under fire the Soviet infantry gun in the farmyard killing all the crew. With German infantry occupying the barn structure and only one gun left for a combination of artillery fire but the bold seizure of the bar caused the Soviet commander to think the better and withdraw this battle was won with the Germans having taken 17 of 30 BR but the Soviet force exceeding its BR of 24 with a victory for the defenders of 4th Panzer division which means but the Soviet Luga Line defence involved will have to withdraw back towards the start line display give the Germans some breathing space future moves in the campaign will show how important this is but the clock is ticking. Next the battle on east of the bridgehead. 

Saturday, 10 September 2022

AAR Out Gunned on the road to Thala


Scenario

This was I Recce Screen scenario for battle group rules facing 800 points of British armour from Gore force against 800 points German panzers from the 10th Panzer division there were three objectives the valley just outside the farm, the road in the centre of the table marked by a desert well and one at the high point on the Ridge marked by destroyed gun. 

British Force 

Main Force 

2 motor rifle platoons  1 platoon mounted in  light lorries

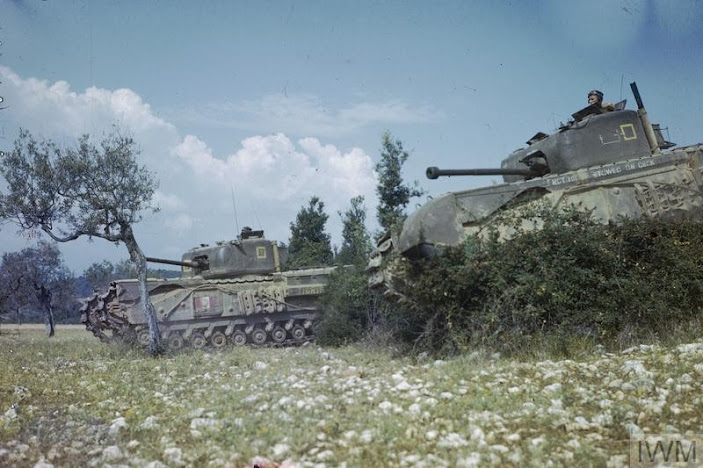
1 squadron of 3 Valantine III tanks 

1 squadron 3 Crusader II tanks 

Support 

off table battery of 2 25 ponder guns 

Reconnaissance

1 infantry foot patrol

1 sniper team

1 Recce HQ in Daimler Dingo

2 Daimler II AC 

German Force 

Main Force 

1 Armoured Panzer Grenadier platoon mounted in Sdkfz251/captured M3 halftracks

 1 platoons of 3 Panzer III kurtz tanks 

1 platoon of 3 Panzer III lang tanks

1 Panzer IV F2 tank

Support 

1 Flakvierling on improvised truck

1 FHQ in Kfz 15

1 Sdkfz236 radio AC

1 Sdkfz 7 HT supply 

Sdkfz250/3 and Luftwaffe air liason officer 

Reconaissance

1 Kradschutze squad in Motorcycle an sidecar

1 Sdkfz222


After Action Report 

The British won the recce battle forcing the Germans to take a chit before the game began. I first deployed a foot patrol into an olive orchard near the farm with the aim of trying to seize the objective nearby. The dingo armoured car would be spotting for my off-table artillery - a battery of 25 pounders. They deployed on the Ridge in the cover of the rocks. My sniper team deployed in some other rocks nearby close to the ridgeline objective. Two Daimler armoured cars deploying in the scrub near the road intended to make a run for the road objective and seize that as well.

Foot patrol in olive orchard
British foot patrol using AB miniatures commandos

Dingo observer 
Sniper and spotter 
Daimler II advance through scrub 
British sniper from AB commando set 

The German reconnaissance surprisingly light and included a motorcycle patrol and a single Skfz 222 armoured car. The motorcycle patrol split sending half of them to grab the objective near the farm supported by the armoured car and the other half straight up the road clearly aiming to seize the well. To prevent that objective falling into British hands. 

My foot patrol exchanged fire with the motorcyclists as they deployed into the scrub pinning them down but not causing any other casualties. The British of Gore Force  with  overwhelming reconnaissance assets we done well during the first reconnaissance phase of the battle causing the Germans to take 3 chits.  With the reconnaissance phase over the main forces begin to advance up the road. I split my force it's two parts one platoon of infantry and my Valentine III tanks would hold the ridge whilst the second platoon of infantry supported by the faster Crusader II’s would advance and try to hold the objectives further ahead on the plane one platoon in lorry's advanced into the scrub and debussed to begin their attack on the well objective. 


Also Valentine's exchanged fire ineffectively with the German Panzer. The German’s had a platoon of armoured panzer grenadiers very expensive points wise but difficult to break and very quick as they are mounted in a mixture of German and American half tracks probably only captured a few days ago. The half tracks immediately use reserve move to move up my left flank onto the Ridge and debussed and attacked along the Ridge swiftly capturing the objective on the high point. It's only defenders my sniper team killed by remarkably accurate artillery fire. 

A strange situation now developed with the Valentine tanks with only a single machine gun attempted to protect the objective from the advancing Panzer Grenadiers. The German infantry made it to the rocky cover and the infantry got the better of it. They seized the objective forcing me to try and take it back but my second infantry platoon were only on foot. I'm there advance would likely to be slow it was at this point that the German artillery fire also destroyed my scout car depriving me of the only link to my off table guns! Meanwhile the Crusader II’s advanced gamely against the Panzer IV special lurking out on the plain. Hoping that by keeping moving and using the folds in the ground they could avoid being picked off by it’s much better 75mm gun. The two pounders on the Crudaders need to too be much closer.

Meanwhile my infantry having formed a base of fire in the valley advanced to seize the well objective. One infantry section, using the armoured car knocked out by a mine for cover seized the objective forcing the Germans take another chit. The tanks on both sides exchanged fire but the short 50 millimetre guns of the panzer III is bounced off the heavy armour of the Valentines. But the  Valentines two pounder guns what able to penetrate the armour on the German tanks occasionally one was pinned. But  it was more success in pinning the German Panzers  from mortar fire the from the tankers.

All across the field but particularly on the right the German tanks advanced bravely forward most of Valentines fired from static positions but they need to try and pin and prevent any further attack  from the infantry on the ridge. While the Panzer contrate there fire against the my tanks

Drawing air attack chit gave me hope . I rolled and the arrival was awas a hurribomber. I had hoped I its cannons would prove useful against the panzers - after all its nickname was the flying tin opener but I hann't taken account of the terrific anti aircraft fire provided by the quad flak mounted on the back of a truck covering the panzers. Pinned and damaged after two successive attacks against the panzers. I decided to leave the hurricane circling the field  before it was shot down and cost me a chit. Having lost his duel against the German flak the RAF eventually was effectively neutered by German anti aircraft fire.

Panzers  continued their advance Panzer III covering the attack buy a half track mounted infantry at the well. My defenders , only one section,  quickly pinned and overwhelmed in a swift and violent assault as the Panzer Grenadier is made good use of their armoured half trucks speed. We were being pushed back all across the front. Eventually the Panzer IV picked off one of the Crusaders.  But Valentine's remained invulnerable to their fire. One  Valentine managed to pick off a long barrelled Panzer 3 in return as the Germans consolidated their hold on all three of the objectives. At this point they could have claimed an all objective held win but we decided to play on.  


The British infantry pursued arriving on foot made heroic efforts to attack the objective on the ridge and capture it back on the German Panzer Grenadiers but with the machine gun support on ambush fire with only the Valentine machine guns as support.  There was little real support for their attack. They were unable to press home that successfully knockout the German defenders  and  recapture the objective.


 They attacked  wave after wave they were never able to recapture this objective and gradually as they were pinned and suppressed chits were taken our battle rating total got closer and closer to the total. At the end of the battle with the Panzer IIIs climbing the ridge towards the Valentines the ridiculousness have tried to knock them out with the Valentines tiny two pounder guns became clearer and clearer and as I reached the battle rating total  at the end of the game only two of the attacking panzers and one of the Crusader II’s have been destroyed


I think overall that the loss of my artillery link early are proved disastrous because it was probably the only thing that could have slowed the panzers down and the Germans own artillery knocking out my defences early on left the objectives open to being quickly seized. My opponent made excellent use of his armoured Panzer Grenadiers these are an expensive asset on the battlefield  to be worth their points they have to make an impact but they were used boldly and  very successfully overall.

A thoroughly enjoyable game I think it was mainly kept in it by my excellent chit draws which got as you can see six special tokens overall but in the end the German player was vastly successful winning the battle comfortably. AS Gore Force withdraws intact towards Thala 


Scenario and AAR Hondeghem 27 May 1940

  Battle of Hondeghem (27 May 1940)  Scenario for Battlegroup Blitzkrieg  The Battle of Hondeghem is one of the most famous small-unit rearg...